

Mastering Time: Your Guide to Using Electronic Timers for Efficient and Precise Control
Time is a precious commodity, and in today's fast-paced world, every second counts. Whether you are managing a production line, cooking a meal, or securing your home, accurate timing control is essential for efficiency and safety. That's where electronic timers come in - these powerful devices provide reliable and precise timing control for a wide range of applications. But with so many types, features, and brands to choose from, how do you select the right timer for your needs? In this guide, we'll explore the world of electronic timers and provide you with all the information you need to master time and take control of your life.
What is the Timer?
A "timer" is an electronic device that can be used to measure a specific interval of time and trigger an event when that time interval has elapsed. Timers can take various forms and can be found in a range of electronic devices, including kitchen appliances, cameras, smartphones, and computers.
In kitchen appliances, a timer is often used to track cooking or baking times. In cameras, a timer can be used to delay the shutter release to allow the photographer to join the group shot. In smartphones and computers, timers are often used to schedule reminders, alarms, and notifications. There are also standalone timer devices that can be used for various applications, such as sports timing or laboratory experiments.

Fig 1. Electronic digital timer
When Was the First Electronic Timer Manufactured?
The history of electronic timers can be traced back to the early 20th century, with the invention of the vacuum tube, which paved the way for the development of electronic circuits. However, the first electronic timer was not manufactured until the mid-1930s.
In 1935, the Chicago-based company, Eagle Signal, introduced the first electronic timer, called the "Eagle Signal Synchronous Timer." This timer used a synchronous motor to keep time and was designed for use in industrial applications, such as controlling the timing of machinery and other processes.
The Eagle Signal Synchronous Timer was a significant breakthrough in the field of electronics. It helped pave the way for the development of more sophisticated electronic timers in the years that followed. Today, electronic timers are ubiquitous and are used in a wide range of applications, from consumer electronics to industrial automation.
Looking for a reliable timing solution? Explore the Autonics AT8N Analog Timer for precise industrial control applications.
What Components does a Timer Include?
Electronic timers can include a range of components depending on their design and application. However, some common components are often found in electronic timers. These include:
Oscillator
An oscillator is an electronic component that generates a waveform at a specific frequency. In electronic timers, an oscillator is used to generate a regular pulse that serves as the basis for the timing circuit.
Counter
A counter is a digital circuit that counts the number of pulses generated by the oscillator. In electronic timers, a counter is used to keep track of the elapsed time.
Display
Many electronic timers include a display that shows the elapsed time or the time remaining until an event occurs. The display can be either digital or analog.
Control circuitry
The control circuitry in an electronic timer is responsible for setting the timing parameters, starting and stopping the timer, and triggering an event when the timer reaches its set time.
Power supply
Electronic timers require a power source to operate. Depending on the application, the power source can be a battery, a DC power supply, or an AC power source.
Input and output devices
Some electronic timers include input and output devices, such as sensors and relays, that allow the timer to interact with other electronic components or systems.
These are some of the most common components found in electronic timers, but the specific components can vary depending on the application and the complexity of the timer circuit.

Fig 2. Digital dual timer
How does a Timer Run?
The basic operation of an electronic timer involves generating a regular pulse, counting the number of pulses, and triggering an event when a certain number of pulses have been counted. Here's a general overview of how a timer runs:
1.Setting the timing parameters
The user sets the timing parameters, such as the time interval and the type of event to be triggered, using the timer's control circuitry.
2.Generating a regular pulse
An oscillator generates a regular pulse at a specific frequency, which serves as the basis for the timing circuit.
3.Counting the pulses
The pulses generated by the oscillator are counted by a counter, which keeps track of the elapsed time.
4.Comparing the count to the set time
The counter's output is compared to the set time interval by the timer's control circuitry.
5.Triggering the event
When the counter's output matches the set time interval, the timer's control circuitry triggers the event, such as sounding an alarm, turning off a device, or triggering a relay.
6.Resetting the timer
After the event is triggered, the timer is reset to its initial state and begins counting pulses again.
The above steps describe the basic operation of an electronic timer, but the specific details can vary depending on the type of timer and its application. For example, some timers may use a different type of oscillator or counter or may have additional input and output devices for interacting with other electronic components or systems.
Timer Calculations
Yes, some basic formulas are used in electronic timers to calculate the time interval or frequency of the oscillator. Here are a few examples:
Time Interval Formula
The time interval (T) of an electronic timer is determined by the frequency (f) of the oscillator and the number of pulses (N) counted by the counter. The formula is:
T = N/f
For example, if the oscillator frequency is 1 kHz and the counter counts 1000 pulses, the time interval would be:
T = 1000/1000 = 1 second
Frequency Formula
The frequency (f) of an oscillator can be calculated using the time interval (T) and the number of pulses (N) counted by the counter. The formula is
f = N/T
For example if the time interval is 10 milliseconds and the counter counts 100 pulses, the frequency would be:
f = 100/(10/1000) = 10000 Hz (or 10 kHz)
These are just a couple of examples of formulas that can be used in electronic timers. The specific formulas used will depend on the design of the timer and its intended application.
Here's a table of common formulas used in electronic timers, along with an example calculation:
Table 1. Formulas table
| Formula | Description | Example |
| T = N/f | Calculates time interval | If the oscillator frequency is 5 kHz and the counter counts 2500 pulses, the time interval would be: T = 2500/5000 = 0.5 seconds |
| f = N/T | Calculates frequency | If the time interval is 10 milliseconds and the counter counts 1000 pulses, the frequency would be: f = 1000/(10/1000) = 100 kHz |
| D = T/N | Calculates duty cycle | If the time interval is 10 milliseconds and the counter counts 500 pulses, the duty cycle would be: D = 10/500 = 0.02 (or 2%) |
| C = N/T | Calculates capacitive reactance | If the oscillator frequency is 1 kHz and the capacitance is 1 microfarad, the capacitive reactance would be: C = 1/(2pi1000*0.000001) = 159.2 ohms |
| R = T/(ln(2)*C) | Calculates resistor value | If the time constant of a timer circuit is 0.1 seconds and the capacitance is 10 microfarads, the resistor value would be: R = 0.1/(ln(2)*0.00001) = 7,848 ohms |
These are just a few examples of formulas that are used in electronic timers, and many other formulas can be used depending on the specific design and application of the timer circuit.
Types of Timers Based on Signals
There are two main categories in which timers are classified:
Analog Timers
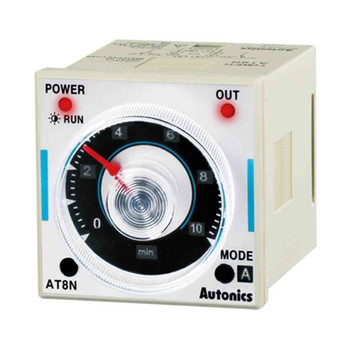
Analog timers are those timers that are set up by knobs and their output is observed with an analog scale. The timing functionalities and scale of an analog timer are easily adjusted with the help of switches mounted on the front side of the timer.

Fig 3. Analog timer
Discover the versatility of our Multi-Function Analog Timer! Click here to explore its wide range of applications and enhance your productivity today!
Digital Timers
Digital timers are adjusted and controlled with the help of digital inputs and their output is also observed with the digital scales. The different buttons are used to set up the timing and set points of a timer. The output is displayed through the LCD mounted on the timer.

Fig 4. Digital timer

Looking for a reliable timing solution? Explore the Autonics LE4S Digital Timer for precise industrial control applications.
What are the Types of Electronic Timers?
There are several types of electronic timers, each with its unique features and applications. Here are some of the most common types of electronic timers:
- Monostable timer: This type of timer is also called a "one-shot" timer and is used to produce a single output pulse of a set duration when triggered. After the output pulse is generated, the timer returns to its original state.
- Astable timer: This type of timer is also called a "free-running" timer and is used to generate a continuous series of output pulses of a set frequency and duty cycle.
- Bistable timer: This type of timer is also called a "flip-flop" timer and is used to produce two stable output states, which can be switched back and forth by applying input pulses.
- Programmable timer: This type of timer allows the user to set and adjust the timing parameters, such as the time interval and type of output signal, using a digital or analog interface.
- Watchdog timer: This type of timer monitors a system or device and generates a reset signal if the system or device stops responding or functioning properly.
- Real-time clock: This type of timer is used to keep track of the current time and date and can be integrated into a wide range of electronic devices, such as computers, appliances, and vehicles.
These are just a few examples of the types of electronic timers that are commonly used. Many other specialized types of timers are used in specific applications, such as pulse-width modulated (PWM) timers for motor control or delay-on timers for lighting systems.
Monostable Timer
Working principle
A monostable timer has one stable state and one unstable state. When a trigger signal is applied, the timer switches to its unstable state and generates an output pulse for a set duration. After the pulse is generated, the timer returns to its stable state.
Usage and applications
Monostable timers are commonly used in applications where a single output pulse is needed, such as for triggering a relay, opening a solenoid valve, or generating a pulse for a counter.
Advantages
Simple and reliable, low cost, and easy to implement in basic electronic circuits.
Disadvantages
Limited functionality, cannot generate a continuous output signal, and may require additional components for pulse shaping.

Fig 5. Monostable timer
Astable Timer
Working principle
An astable timer has no stable states and continuously generates a series of output pulses of a set frequency and duty cycle. The output signal switches between high and low states based on the charge and discharge of a timing capacitor and a timing resistor.
Usage and applications
Astable timers are commonly used in applications where a continuous output signal is needed, such as for generating clock signals, driving LEDs, or producing audio tones.
Advantages
Simple and versatile, can generate a wide range of frequencies and duty cycles, and can be used as a basic oscillator in electronic circuits.
Disadvantages
Output signal may be sensitive to variations in supply voltage or component values, and may require additional components for signal conditioning.

Fig 6. Astable-timer
Don't miss out on this advanced technology. Experience precise control with our Digital Timer Power ON Start, Flicker Output.
How to Calculate Output Voltage Frequency
The frequency is the number of pulses per second. The formula to calculate the frequency of the output voltage is

Fig 7. Astable formula
A 50% duty cycle means the high time is equal to the low time. If an LED is placed at the output of this astable circuit, it will turn on at the same span of time as it is turned off. Note that getting an exact 50% duty cycle is impossible with this circuit.
Bistable Timer
Working principle
A bistable timer has two stable states and can be switched back and forth between these states by applying input signals. The output signal remains in its current state until a trigger signal is applied to switch it to the opposite state.
Usage and applications
Bistable timers are commonly used in applications where a stable digital output signal is needed, such as for storing data in memory, switching between two power sources, or controlling a motor direction.
Advantages
Simple and reliable, can maintain output states without continuous input signals, and can be used as basic memory elements in digital circuits.
Disadvantages
Limited functionality, cannot generate continuous output signals, and may require additional components for input signal conditioning.

Fig 8. Bistable-timer
Programmable timer
Working principle
A programmable timer allows the user to set and adjust the timing parameters, such as the time interval and type of output signal, using a digital or analog interface. The timing parameters are stored in memory and can be changed as needed.
Usage and applications
Programmable timers are commonly used in applications where timing flexibility is needed, such as for industrial automation, lighting control, or motor control.
Advantages
Versatile and customizable, can be easily adjusted to meet changing requirements, and can be integrated with other digital systems.
Disadvantages
More complex and expensive than basic timers, may require specialized programming or configuration
tools, and may be sensitive to electrical noise or interference.

Fig 9. 7-Day Programmable Timer
Watchdog Timer
Working principle
A watchdog timer monitors a system or device and generates a reset signal if the system or device stops responding or functioning properly. The watchdog timer generates a periodic signal that must be acknowledged by the system or device to prevent the reset signal from being triggered.
Usage and applications
Watchdog timers are commonly used in safety-critical applications where system failures could have serious consequences, such as in medical equipment, aerospace systems, or automotive electronics.
Advantages
Provides an added layer of safety and reliability, and can prevent system crashes or lockups.
Comparing Table
Table 2. Comparing different types of timers
| Timer Type | Working Principle | Usage and Applications | Advantages | Disadvantages |
| Monostable Timer | Has one stable state and one unstable state. Generates an output pulse for a set duration when triggered. | Used for generating single output pulses, such as for triggering a relay or opening a solenoid valve. | Simple and reliable, low cost, and easy to implement. | Limited functionality, cannot generate a continuous output signal, and may require additional components for pulse shaping. |
| Astable Timer | Has no stable states and continuously generates a series of output pulses of a set frequency and duty cycle. | Used for generating continuous output signals, such as for generating clock signals or driving LEDs. | Simple and versatile, it can generate a wide range of frequencies and duty cycles and can be used as a basic oscillator. | Output signals may be sensitive to variations in supply voltage or component values, and may require additional components for signal conditioning. |
| Bistable Timer | Has two stable states and can be switched back and forth between them by applying input signals. | Used for maintaining stable digital output signals, such as for storing data in memory or controlling a motor direction. | Simple and reliable, can maintain output states without continuous input signals, and can be used as basic memory elements. | Limited functionality, cannot generate continuous output signals, and may require additional components for input signal conditioning. |
| Programmable Timer | Allows the user to set and adjust the timing parameters using a digital or analog interface. | Used for applications where timing flexibility is needed, such as for industrial automation or lighting control. | Versatile and customizable can be easily adjusted to meet changing requirements and can be integrated with other digital systems. | More complex and expensive than basic timers, may require specialized programming or configuration tools, and may be sensitive to electrical noise or interference. |
| Watchdog Timer | Monitors a system or device and generates a reset signal if the system or device stops responding or functioning properly. | Used in safety-critical applications, such as medical equipment or aerospace systems, to prevent system failures or crashes. | Provides an added layer of safety and reliability, can prevent system crashes or lockups, and can be easily integrated. | May add complexity to the system design, may require additional power consumption, and may be affected by false triggers or errors. |
| Time Delay Relay | Controls the switching of a load after a set time delay, triggered by a control signal. | Used in applications where a time delay is required before turning on or off a load, such as in lighting control or motor control. | Simple and reliable, low cost, and can be used for controlling a wide range of loads. | Limited functionality, may require additional components for control signal conditioning, and may be sensitive to electrical noise or interference. |
Unlock the potential of counters with our informative blog post! Dive into the world of counting mechanisms and discover new possibilities. Read our blog now!
Types of Timers Based on Application
Electrical timers automatically turn lights, appliances, irrigation systems, and motion sensors on and off, saving you money, water, and energy. This guide00 will help you understand the different types of timers and the tasks they perform.

Fig 10. Electrical timer
Lighting and Appliance Timers
Timers attached to motion detectors increase security in and around your home while putting program lights and appliances on a schedule that fits your routine. There are a variety of timers to choose from depending on what your needs are. From indoor to outdoor timers, and everything in between, timers are designed to make your life safer and more seamless.

Fig 11. Lighting and Appliance Timers
Motion Detectors
- Senses movement in a room and automatically turns on the light for a preset amount of time, or until the switch senses the room is empty.
- Ideal for bathrooms, laundry rooms or rooms where the light is often left on, or where you need hands-free activation.
- Ideal for garage doors or porches.

Fig 12. Motion Detectors
Timer Switch
A timer switch is a great choice for rooms where you won't need to occupy them for very long. They are also great for conserving energy. Here are a few other characteristics of timer switches:
- Has a button or knob that turns on a light for a preset amount of time.
- Option to override controls with the touch of another button.
- Ideal for minimizing moisture in bathrooms if used to control bathroom vent fans.
- To be most effective, start the fan 5 minutes before a shower, and can be set to run 10 minutes after a shower.

Fig 13. Timer switch
Programmable Switch
- Programmable switches allow you to have complete control over your timing device.
- It allows you to set a timer to turn lights, fans, heaters or other appliances on and off with different settings for each day of the week.
- Can be programmed to turn lights on and off at random times when you’re out of town.

Fig 14. programmable switches
Some programmable switches offer different settings for the 7 days of the week (or you can set the same schedule for every day), but some don’t have this feature. “Random” mode is not offered on every model, so it’s something to look for if home security is a concern.
Note: Not all programmable switches support appliances. Some are only designed to handle lights. Make sure you buy a switch with the correct feature(s) and power rating for your needs.
Plug-In Timer
Plug-in timers are unique in the way that the device being timed is plugged directly into the timer. Here are a few more characteristics of plug-in timers.
- Allows you to use a timer on one lamp or appliance without the need to rewire wall switches.
- Heavy-duty timers available for appliances.
- Mechanical and digital varieties available.
- Outdoor timers come with weather-resistant housing.

Fig 15. Plug-in timer
Sprinkler System Timers
Irrigation system timers allow you to preset your lawn watering schedule. They can be used with outdoor faucets and garden hoses, or more complex irrigation systems.

Fig 16. Sprinkler System Timers
Mechanical Timers
Mechanical timers, which can attach to a garden hose or faucet, are the most economical and reliable because they don’t operate on external power. They are manually set, with gears you rotate by hand like a kitchen timer. With limited programming options, mechanical timers are best suited for yards that don’t require varying amounts of water.

Fig 17. Mechanical Timer
Battery-Operated Timers
It runs on a battery that generally lasts for a full season. The timer attaches to a garden hose or faucet and often has automatic on-and-off features, so you can schedule when watering should begin and end. Some models can run multiple programs, making them a popular choice for gardeners who travel frequently. If the battery dies, however, the programs will usually be lost.

Fig 18. Battery-Operated Timers
Electronic Timers
Electronic timers attach to the main water supply and allow you to program multiple schedules for watering different areas of your yard, at different times of the day, for different lengths of time. Some come with software that allows you to program your sprinklers remotely using your computer or phone.
Smart technology has allowed complete autonomy over timing devices. Here are some of the latest advances:
Wi-Fi-enabled smart hose timers:
- Connect to a smartphone or smart home device via the home’s Wi-Fi.
- Can connect to multiple devices at the same time.
- Users can adjust watering schedules from phones, tablets, and compatible smart home devices.
Bluetooth-enabled smart hose timers:
- Simpler functionality than Wi-Fi-enabled.
- Can only connect to one device.
- Not typically used with smart home devices, Bluetooth usually communicates with an app allowing users to adjust watering schedules from anywhere.
“Rain technology” is sometimes available in different forms:
- Designed to prevent unnecessary watering while it’s raining out.
- Rain-delay functions allow you to skip the watering cycle on a rainy day (manually at the timer, or through a smart home connection).
- Rain-sensing functions involve using a moisture sensor put in the ground, used to detect when the soil has reached proper saturation and shut off the water.
- Weather forecasting (Wi-Fi and Bluetooth devices only) lets the timer scan local weather forecasts and set the watering schedule accordingly. Only as accurate as your local weather forecast is.

Fig 19. Electronic Timer
What is the difference between a mechanical timer and an electrical timer?
The main difference between a mechanical timer and an electrical timer is the method of operation. A mechanical timer uses mechanical components such as gears, springs, and levers to control the timing function, while an electrical timer uses electronic components such as transistors, capacitors, and resistors to perform the same function.
Here are some specific differences between mechanical and electrical timers:
1.Accuracy
Electrical timers are generally more accurate than mechanical timers because they use electronic components that are less affected by temperature changes and wear and tear.
2.Flexibility
Electrical timers are more flexible than mechanical timers because they can be easily programmed and adjusted, while mechanical timers usually have fixed timing intervals.
3.Noise
Mechanical timers can produce audible ticking sounds as they operate, while electrical timers operate silently.
4.Size
Electrical timers are generally smaller and more compact than mechanical timers, which can be bulky and require more space.
5.Cost
Electrical timers are generally more expensive than mechanical timers due to the cost of electronic components.
6.Maintenance
Mechanical timers require more maintenance and may need to be cleaned or lubricated periodically, while electrical timers generally require less maintenance.
What industries are timers used in?
Electronic timers have a wide range of applications in various fields, including industrial automation, consumer electronics, automotive, aerospace, and medical equipment. Here are some examples of timer applications:
1.Lighting control
Timers can be used to turn lights on and off at specific times, such as in outdoor lighting or street lighting.
2.Motor control
Timers can be used to control the operation of motors, such as in pumps, conveyors, and HVAC systems.
3.Process automation
Timers can be used to control the timing of various processes, such as chemical reactions, manufacturing operations, and food processing.
4.Consumer electronics
Timers can be used in various consumer electronics, such as in microwave ovens, washing machines, and coffee makers.
5.Automotive
Timers can be used in automotive applications, such as in engine control units, power window control, and ignition systems.
6.Aerospace
Timers are critical components in aerospace systems, such as navigation systems, flight controls, and safety devices.
7.Medical equipment
Timers can be used in medical equipment, such as in infusion pumps, respirators, and monitoring systems.
These are just a few examples of timer applications, and the possibilities are endless. Electronic timers are versatile components that can be used in almost any application where precise timing is required.

Fig 20. NE55 timer IC
Installation and maintenance How to use a timer?
Using a timer can be quite simple, and there are several ways to do it depending on the specific device or application. Here are some general steps you can follow to use a timer:
Determine the purpose
First, determine the purpose of the timer and how you want to use it. For example, do you want to use the timer to turn an appliance on and off at specific times, or to control the duration of a process?
Choose the type of timer
Next, choose the type of timer that is most suitable for your needs. This may depend on factors such as the required accuracy, flexibility, and ease of use.
Set the timer
Once you have chosen the type of timer, set the timer according to your needs. This may involve programming the timer using buttons or a display screen or manually adjusting a dial or switch.
Start the timer
Once the timer is set, start the timer by pressing the appropriate button or switch. The timer will then begin counting down or controlling the timing of the process.
Monitor the timer
While the timer is running, monitor the timer to ensure that it is functioning properly and that the process is being timed correctly.
Stop the timer
When the timer reaches the end of the set timing interval, it will usually stop automatically. If the timer does not stop automatically, stop the timer manually by pressing the appropriate button or switch.
Does the timer need calibration?
Yes, some types of timers may require calibration to ensure accurate and consistent timing intervals. Calibration is the process of adjusting the timer to ensure that it provides accurate and reliable timing intervals over time.
The calibration procedure may vary depending on the type of timer, but it generally involves comparing the timer's output against a reference standard of known accuracy and making adjustments as needed. Here are some general steps that may be involved in calibrating a timer:
1.Prepare the timer
Before calibrating the timer, ensure that it is properly installed and set up according to the manufacturer's instructions. Also, ensure that any external factors that may affect the timer's accuracy, such as temperature or vibration, are minimized.
2.Choose a reference standard
Choose a reference standard of known accuracy that is appropriate for the type of timer you are calibrating. This may be a calibrated stopwatch, an atomic clock, or another standard timekeeping device.
3.Perform the calibration
Start the timer and compare its output against the reference standard. Record any differences between the two, and make any necessary adjustments to the timer to align it with the reference standard. Repeat the process as needed until the timer is calibrated to the desired level of accuracy.
4.Record the results
Once the calibration is complete, record the results of the calibration, including any adjustments made and the final accuracy of the timer. This information may be needed for future reference or quality control purposes.
It is important to note that the calibration procedure may vary depending on the type of timer and the specific application. Always refer to the manufacturer's instructions or user manual for specific guidance on how to calibrate your timer. Additionally, some timers may require specialized equipment or expertise to calibrate properly, so it may be necessary to seek professional calibration services in some cases.
What are the advantages of using a timer?
There are several advantages to using a timer in electronic devices and systems. Here are some of the key advantages:
1.Improved Efficiency
A timer can help improve the efficiency of a system by automating timing functions and reducing the need for manual intervention. This can save time and labor costs, as well as improve the overall performance of the system.
Precision Timing: Timers can provide precise and accurate timing intervals, which is important in applications where timing accuracy is critical. This can help ensure that processes are completed on time, and can also help prevent errors or other issues that may arise from timing inconsistencies.
2.Flexibility
Timers can be programmed to operate in a wide range of timing intervals, from microseconds to hours or days. This allows them to be used in a variety of applications and systems.
3.Cost-Effective
Timers are generally relatively inexpensive, especially compared to the costs of manual labor or other alternatives for performing timing functions. This makes them a cost-effective solution for many applications.
4.Increased Safety
In some applications, such as industrial processes or medical procedures, precise timing is essential to ensure safety. A timer can help ensure that processes are performed in a safe and controlled manner, reducing the risk of accidents or other safety issues.
What are the disadvantages of using a timer?
While there are many advantages to using a timer in electronic devices and systems, there are also some potential disadvantages to consider:
1.Complexity
Some types of timers can be complex and difficult to program or operate, which may require specialized knowledge or training.
2.Maintenance
Timers may require regular calibration and maintenance to ensure accurate and reliable operation over time. This can add to the overall cost and maintenance requirements of a system.
3.Limited Functionality
While timers can be used for a wide range of applications, they are typically limited to performing timing functions and may not be suitable for other types of operations.
4.Sensitivity to Environmental Factors
Timers can be sensitive to changes in environmental factors such as temperature, humidity, and voltage fluctuations, which can affect their accuracy and reliability.
5.Power Consumption
Some types of timers may consume more power than others, which can be a concern in battery-powered devices or other applications where power consumption is a critical factor.
Overall, while the disadvantages of using a timer are relatively minor compared to their benefits, it is important to consider these factors when selecting a timer for a specific application and to ensure that it is properly calibrated and maintained over time to ensure reliable and accurate operation.
How to choose the right timer?
Choosing the right timer for a specific application can be a complex process, as there are many different types of timers available, each with its own unique features and specifications. Here are some key factors to consider when selecting a timer:
1.Timing Range
The timing range of a timer refers to the range of time intervals that it can measure or control. It is important to select a timer that can handle the required timing range for the specific application.
2.Accuracy
The accuracy of a timer is a critical factor, especially in applications where timing accuracy is critical. It is important to select a timer that provides the required level of accuracy for the application.
3.Input Voltage
The input voltage of a timer refers to the voltage required to operate the timer. It is important to select a timer that operates on the same voltage as the system or device in which it will be used.
4.Control Type
Timers can be controlled using various types of inputs, including digital, analog, and wireless. It is important to select a timer with a control type that is compatible with the system or device in which it will be used.
5.Operating Conditions
The operating conditions of a timer, such as temperature, humidity, and vibration, can affect its performance and reliability. It is important to select a timer that can operate under the expected environmental conditions.
6.Cost
Timers can vary widely in cost, depending on their features and specifications. It is important to select a timer that provides the required level of functionality at a cost that is within the available budget.
Overall, choosing the right timer for a specific application requires careful consideration of its features, specifications, and operating conditions, as well as an understanding of the requirements and constraints of the system or device in which it will be used.
What is the best brand of timers in the industry?
There are many different brands of timers available in the industry, and the "best" brand will depend on the specific requirements and preferences of the user. Here are some popular brands of timers:
- Omron: Omron is a Japanese company that produces a wide range of timers and other industrial automation equipment.
- Schneider Electric: Schneider Electric is a multinational company that produces a wide range of electrical equipment, including timers.
- Siemens: Siemens is a German company that produces a wide range of industrial automation equipment, including timers.
- Honeywell: Honeywell is an American multinational company that produces a wide range of industrial automation and control equipment, including timers.
- Autonics: Autonics is a Korean multinational company that produces a wide range of industrial automation and control equipment, including timers.
These are just a few examples of popular timer brands in the industry, and there are many other reputable brands available as well. When selecting a timer brand, it is important to consider factors such as the brand's reputation, the quality of its products, and its customer service and support. It is also a good idea to read reviews and compare specifications and prices to find the best option for your specific needs.
Conclusion
In conclusion, timers are electronic devices that provide accurate and reliable timing control for a wide range of applications in various industries. They come in different types, including mechanical and electrical timers, and offer various features and functions to suit different needs. When selecting a timer, it is important to consider factors such as the timing range, accuracy, input voltage, control type, operating conditions, and cost. There are many reputable brands of timers in the industry, each with its unique features and specifications, so it is important to do research and choose the one that best fits your specific requirements and preferences.
To recap
1.What is a timer?
A timer is an electronic device that provides accurate and reliable timing control for a wide range of applications.
2.What is the difference between a mechanical timer and an electrical timer?
A mechanical timer uses physical mechanisms such as gears and springs to control timing, while an electrical timer uses electronic components such as transistors and capacitors.
3.What are the types of electronic timers?
Some types of electronic timers include programmable timers, interval timers, delay timers, cyclic timers, and event-based timers.
4.What are the advantages of using a timer?
Some advantages of using a timer include precise and accurate timing control, increased efficiency and productivity, reduced human error, and improved safety.
5.What are the disadvantages of using a timer?
Some disadvantages of using a timer include the need for maintenance and calibration, the potential for electronic malfunctions, and the risk of the timer being programmed incorrectly.
6.Where are electrical timers used?
Electrical timers are used in a wide range of applications, including industrial automation, home appliances, lighting control, and security systems.
7.What types of electronic devices need to have a timer?
Electronic devices such as washing machines, microwave ovens, air conditioners, and security systems often have timers built in.
8.What is the timing range of a timer?
The timing range of a timer refers to the range of time intervals that it can measure or control.
9.What is the accuracy of a timer?
The accuracy of a timer refers to its ability to measure or control time intervals with a high degree of precision.
10.How do you select the right timer for an application?
When selecting a timer, consider factors such as the timing range, accuracy, input voltage, control type, operating conditions, and cost.
11.How do you use a timer?
To use a timer, simply set the desired time interval using the controls provided, and start the timer. The timer will then count down the specified interval and trigger a signal or action when the time has elapsed.
12.Do timers need to be calibrated?
Yes, timers may need to be calibrated periodically to ensure accurate timing control.
13.How is a timer calibrated?
Calibration of a timer typically involves comparing its actual performance against a known standard and adjusting it as necessary.
14.What are some popular brands of timers?
Some popular brands of timers include Omron, Schneider Electric, Siemens, Honeywell, and ABB.
15.What are some common applications of timers?
Common applications of timers include industrial automation, lighting control, security systems, cooking appliances, and medical equipment.
References
https://www.homedepot.com/c/ab/types-of-timers/9ba683603be9fa5395fab90d70c9717
https://www.gopresto.com/product/presto-electronic-digital-timer-04213
https://www.tfa-dostmann.de/en/product/digital-dual-timer-38-2025/
https://www.directindustry.com/prod/autonics/product-23164-1545709.html
https://www.directindustry.com/prod/general-industrial-controls-p-ltd/product-61204-1211383.html
https://www.allaboutcircuits.com/tools/555-timer-astable-circuit/
https://www.electronics-tutorials.ws/waveforms/555_timer.html
https://electronicsclub.info/555bistable.htm
https://how2electronics.com/555-timer-ic-features-pinout-working-circuit-operating-modes/
https://www.intermatic.com/Catalog/us/Products/Timer-Controls/Mechanical-Time-Switches
Recent Posts
-

Booster Pump Troubleshooting and Maintenance: How to Fix and Prevent Common Issues
1. Introduction Imagine turning on your faucet only to be greeted with a weak trickle of water when …22nd Apr 2025 -

Energy-Efficient Booster Pumps: Selection and Tips for Maximizing Performance
1. Introduction Imagine never having to deal with fluctuating water pressure, noisy pumps, or skyroc …19th Apr 2025 -

Booster Pumps for Sustainable Water Systems: Irrigation and Rainwater Harvesting Solutions
1. Introduction Water scarcity is no longer a distant threat—it’s a reality affecting millions …16th Apr 2025